Secrets of Mom Search Results

Showing posts with label oatmeal. Show all posts

Friday, January 27, 2012

Food Storage Friday: Cranberry Upside-Down Breakfast Cake

I found this recipe in the newspaper a couple weeks ago and made it for my family last weekend (adapted using food storage). It was delicious and helped me use some of the very large bag of cranberries that I have in my freezer. (That's three experimental recipes in a row and they were all winners! Score!) My family made this disappear fast. We will definitely be making this again, but only for special occasions, because it is very sugary.

Cranberry Upside-Down Breakfast Cake
Food Storage Ingredients:
1/4 cup of chopped almonds
1/2 cup packed dark brown sugar
1/4 tsp cinnamon
1/2 tsp salt
1/2 cup whole wheat flour
1/2 cup oat flour
1/2 cup all-purpose white flour
1 tsp baking powder
1 cup white sugar
1 tsp vanilla extract
1 cup powdered sugar

Fresh Ingredients:
1/2 cup butter, divided & softened
1 tsp orange rind
5 Tbsp fresh orange juice
1 egg
1/2 cup buttermilk (I used rice milk with vinegar.)
1 & 1/2 cup fresh cranberries (or frozen and defrosted)
1 heaping Tbsp ground flax seed

1. Preheat oven to 350. Coat a 9" square or round pan with cooking spray and dust with flour. 2. In a small bowl combine almonds, cranberries, and orange rind. 3. In a small saucepan combine three Tablespoons orange juice, two Tablespoons butter, brown sugar and cinnamon. Stir constantly for three minutes and pour into pan. Cover with cranberry mixture. 3. Whisk flours, salt, flax seed and baking soda in a medium bowl. 4.In a large bowl, beat white sugar and remaining butter until creamy. Add vanilla, egg and flour mixture. Spoon over cranberries. 5. Bake for 40 minutes or until passes toothpick test. Cool in pan for 5 minutes while making glaze. 6. Mix remaining orange juice and powdered sugar until smooth. Pour over inverted cake.
Notes: I was surprised that it turned out looking as well as it did, because after I inverted it about 90% of the sugary coating was stuck to the bottom of the pan. Wha? I used a non-stick silicone pan and sprayed and flour it. So I scraped the sugary mess out of the pan with a fork and then arranged it back on the cake. Most of the cranberries had migrated into the cake, but the nuts were left behind in the pan with the sugar. Now that won't do. That orange glaze really helped with the appearance of the cake. So just make sure that you HEAVILY grease your pan.

Friday, January 6, 2012

Food Storage Friday: Baked Apple Pancakes

I based this recipe off one that I found in a food storage cookbook a few years ago. I know I found it in a food storage cookbook, but that doesn't mean that I would consider a food storage recipe since the only food storage ingredients that it called for were white flour, white sugar and spices. That's not really using your food storage, those are just common baking ingredients. It's like saying that living off Cheetos and breadsticks makes you a vegetarian. All-purpose white wheat flour is not meant for long term storage, it loses it's nutritional value too quickly. This dish is however tasty, and I changed the recipe so that it does actually incorporate food storage ingredients by substituting oat flour. I make my own oat flour by throwing oats in the blender for 10 seconds. Oats have a significantly longer shelf life than white flour. I make this whenever I have apples that have gone a little soft, but haven't gone bad yet. It is a favorite of Thing 1's. As I am currently doing the pantry challenge I used powdered eggs from my food storage. This time I used almond milk, but I have also made this with reconstituted powdered milk and it has worked just fine.

Baked Apple Pancake
Food Storage Ingredients:
2 Tablespoons sugar
1/2 teaspoon cinnamon
dash nutmeg
1 cup oat flour
1 teaspoon salt
powdered sugar (optional)
maple syrup (optional)
1 heaping tablespoon ground flax seed (optional)

Fresh Ingredients:
2 Tablespoons butter
2 apples, cored and diced
1 cup milk
6 eggs

1. Preheat oven to 400 degrees. 2. In a frying pan saute diced apples with butter, cinnamon and sugar until tender. Transfer to a sprayed cooking pan. 3. In a blender whip eggs, flour, milk, salt, nutmeg and flax seed. Pour over cooked apples. 4. Bake for 16-18 minutes. Dust with powdered sugar or top with syrup. Serves 6 and reheats well.

Friday, November 25, 2011

Food Storage Friday: Vegan Pumpkin Waffles

 Lately I haven't been doing much with my food storage because there is so much of it that I can't eat due to the fact it makes my breast-feeding baby scream and vomit. Because of my dietary restrictions, I'm also getting very tired of the things that I can eat. I've gotten to the point where I usually would rather go hungry than have oatmeal for breakfast again. Enter friend Julie, who has also done a stint as a vegetarian. She gave me a recipe for these great pumpkin waffles that are satisfying and were a hit with all family members. Now that's saying something when you're cooking for my crew.  Thanks so much Julie! Of course I made a few changes so I was incorporating food storage and making them a little healthier. They're great with maple syrup or Apple Cider Sauce. Makes 12 waffles.

Vegan Pumpkin Waffles 
Food Storage Ingredients:
1/2 cup wheat flour
1/2 cup oat flour
1 1/2 cups all-purpose flour
2 1/2 teaspoons baking powder
1/2 teaspoon baking soda
2 teaspoons cinnamon
1/4 teaspoon cloves
1 teaspoon ground ginger
1/2 teaspoon ground nutmeg
1/2 teaspoon salt
1/3 cup brown sugar
1 15 oz can pumpkin (not pumpkin pie mix)
1/3 cup canola oil
1 Tablespoon vanilla extract

Fresh Ingredients:
2 cups rice, soy or almond milk*
1 Tablespoon ground flax seed*
1 Tablespoon wheat germ*

1. Thoroughly mix wet ingredients and sugar in a bowl. 2. In a separate (large) bowl, mix dry ingredients. 3. Combine wet and dry ingredients. 4. Spray waffle iron with non-stick cooking spray and prepare according to waffle iron instructions.

Notes: Currently I can't have soy or dairy, so I made these with almond milk. I imagine that someday when my diet is less restricted and I'm in a pinch, I'll use the powdered milk from my food storage. From what I have read whole flax seed has a shelf life of three to five years, while ground flax seed can go rancid in as little as a week. I generally grind a cup at a time and store it in the fridge. Ground flax seed is great vegan source of Omega 3, 6, & 9 fatty acids as well as fiber. Wheat germ is a good source of fiber and B vitamins. Whenever I make waffles I add both wheat germ and ground flax seed for their health benefits and the fact that you can't taste them. Both these ingredients are optional, but I figure if I can get my family to willingly eat better, why not?

Friday, July 8, 2011

Food Storage Friday: No-Bake Energy Bars

Well  it's summer in St George and I have officially reached that point where I avoid using my oven at all costs. Recently I found this recipe for  no-bake energy bars and I am in love. I found the recipe on Skinny Bovine's Kitchen and she got it from Love Veggies and Yoga. I made a couple of minor changes. These things make a great breakfast on the go. Enjoy.

No-Bake Energy Bars
Food Storage Ingredients:
2 1/2 cups old fashioned oats
1/2 cup peanut butter
1/2 cup shredded coconut
1/3 cup chopped nuts (I used cashews)
1/2 cup maple syrup (the real stuff)
1/2 cup dried fruit (I used craisins)
1 tsp vanilla
1/2 tsp cinnamon
2 Tablespoons chocolate chips (optional)

Fresh Ingredients:
1 ripe banana, mashed
1 Tablespoon wheat germ (optional)

1. Mix all ingredients in a bowl. 2. Flatten on a cookie sheet lined with wax paper. (I found to fill a standard size cookie sheet you need to double the batch.) 3. Freeze for 8 hours, cut into bars, wrap in plastic wrap or individual baggies. Store in the freezer because they soften up quickly.

Eating these when they soften up reminds me of eating oatmeal cookie dough, but it's safer and healthier.

Friday, June 17, 2011

Food Storage Friday: Banana Bread

This recipe is based loosely off of one from 101 Things to Do with a Cake Mix. (Which by the way I love.) There are probably banana bread recipes out there that are more wholesome and more strongly food storage based, but this one is so yummy and so easy. When we lived closer to my sister-in-law, she would baby-sit our kids in exchange for this banana bread.

Banana Bread
Food Storage Ingredients:
1 cup oatmeal
1 yellow cake mix
1 small box banana or vanilla pudding
1/4 cup oil
1/4 cup applesauce (I used some that I canned last fall, so yummy!)
3/4 teaspoon cinnamon
1 Tablespoon vanilla

Fresh Ingredients:
3 ripe medium bananas
3 eggs
1/2 cup water

1.Preheat oven to 350 degrees. 2. Mix all ingredients until smooth. 3. Divide between 2 greased bread pans. Bake for 45 minutes or until toothpick comes out clean.

Friday, June 3, 2011

Food Storage Friday: Mini Meatloaves and Mashed Potatoes

Surprisingly of all my food storage recipes, my meatloaf is the biggest crowd pleaser (with the exception of my wheatberry salsa, but that's more a snack than a meal.) This is unfortunate, because I generally try to avoid preparing meals that involve me squishing my fingers in raw meat.  My in-laws (who as a group are generally against eating healthy) love it and every time I bring the leftovers to work, someone asks me what in the world I am eating because it smells amazing. Seems like good enough tests for me. I found the recipe that I based this off of in Taste of Home's Budget Suppers. Of course I cut down the salt, doubled the whole grain and changed things up a bit to turn it into something I would want to eat. The secrets that makes this meatloaf so great are:
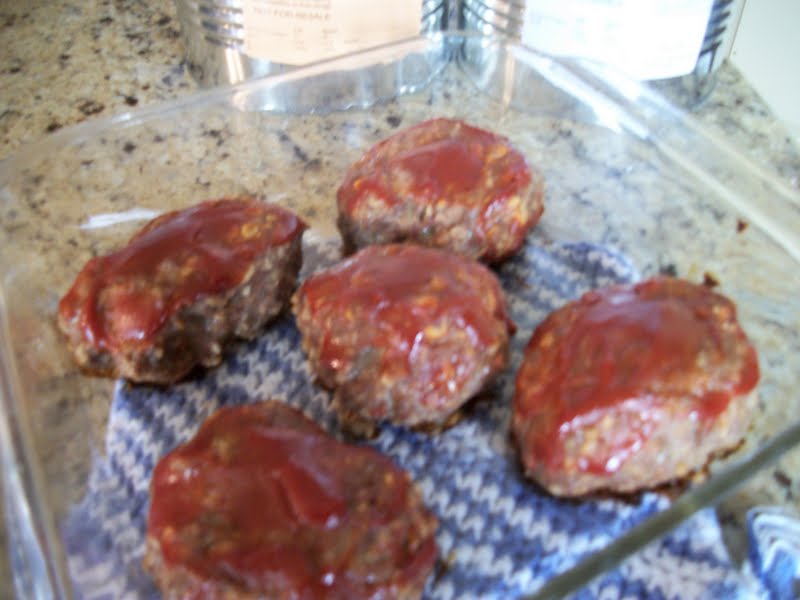
  1. The sauce on top
  2. They are smaller so they cook faster than the average meatloaf 
  3. The Worcestershire sauce inside to give it a little zip
Mini Meat Loaves
Food Storage Ingredients:
1 1/2 cups rolled oats
1/2 cup evaporated milk
3/8 cup dried minced onion
1/2 teaspoon salt
1/4 teaspoon black pepper
2 Tablespoons Worcestershire sauce
1 Tablespoon brown sugar
1/3 cup ketchup
1 Tablespoon prepared mustard
mashed potatoes, prepared according to directions

Fresh Ingredients
1 egg, lightly beaten
1 1/2 pounds extra lean ground beef

1. Mix oats, milk, egg, onions, salt, pepper and Worcestershire sauce in a bowl. 2. Mix in ground beef until mixed thoroughly. 3. Form into balls, (I make them slightly smaller than my fist, but I have small hands) I put a small dent in the middle with my thumb to thin out the part where the meat is the thickest to help make sure that they cook more evenly and also hold some of the sauce in. 4. Mix ketchup, brown sugar and mustard into a sauce and spoon over meatloaves. 5. Bake at 350 for 35-45 minutes. Serve with mashed potatoes and vegetables. Makes 10 mini meatloaves.


Notes: I feel like this meal is somewhat higher intensity than I usually do, so I serve it with mashed potatoes, which are like the fast food of the food storage world. These also freeze and reheat well.

Friday, March 18, 2011

Food Storage Friday: Homemade Granola

I love granola. Unfortunately, I feel it is over priced and it very rarely goes on sale. Fortunately it is very easy and cheap to make. It is also very easy to customize to your tastes, just add whatever nuts or fruit please you and your family.

Homemade Granola
Food Storage Ingredients:
6 cups rolled oats
2 cups nuts or seeds
1 Tablespoon canola oil
1 teaspoon cinnamon
3/4 cup maple syrup (the real stuff, mind you) or honey
1 cup dried fruit
Optional Ingredients:
1 cup shredded coconut
1 Tablespoon wheat germ

1. Mix oats, nuts, (coconut) and oil. 2. Add cinnamon (and wheat germ) and stir thoroughly. 3. Mix in maple syrup, until well coated. 4. Spread on two cookie sheets and bake at 350 for ten minutes. 5. Remove from oven and stir and re-spread granola so edges don't burn. 6 Bake for another 10 minutes. If you want it to be extra crunchy, bake for another 5-10 minutes. 7. Add dried fruit. Store in the refrigerator.

For my first batch I used almonds, craisins and dried apples, for my second I use almonds, pecans and dried strawberries. Follow your heart or whatever you happen to have in your pantry.

Thursday, March 3, 2011

Food Storage Friday: Cherry Pineapple Crisp

 One of my husband's favorite desserts is Cherry Crisp. Heather HATES cherries, but I do make some for him every year on Valentine's (and his mother makes it for his birthday). This year I decided to change it up a little bit, I liked it enough that I even ate a piece this year.

Cherry Pineapple Crisp
Food Storage Ingredients:
2 cans cherry pie filling
1 cup drained crushed pineapple
3/4 cup brown sugar
1/2 cup oat flour
1 cup rolled oats
1/4 cup white sugar
1/2 teaspoon cinnamon
1/4 teaspoon nutmeg
1/4 cup shredded coconut

Fresh Ingredients:
6 Tablespoons melted butter
Vanilla ice cream (optional)

1.Preheat oven to 375 degrees. Mix pie filling and pineapple in a 9x13 pan. 2. Mix remaining ingredients and sprinkle over pie filling. Bake for thirty minutes.

Friday, October 8, 2010

Food Storage Friday: Apple Almond Oatmeal

Before making this breakfast I had never actually made oatmeal other than of the instant variety. I like that this recipe uses a crock pot, has few ingredients and they are all ingredients that I have on hand anyway. I liked that it has almonds in it because a breakfast of just oatmeal doesn't have enough protein to get you through the morning. I also like that the apples make it so there isn't much sugar required. Plus you wake up to your house smelling like cooked apples.

Apple Almond Oatmeal
Food Storage Ingredients
1 cup steel-cut or old-fashioned oats
1 cup apple juice
1/4 cup sliced or slivered almonds
1/2 tsp cinnamon
1/4 tsp nutmeg
1 tsp vanilla
1/2 tsp brown sugar

Fresh Ingredients
1 & 2/3 cup of apples, peeled and chopped
1 cup water

1. Combine ingredients in a small slow cooker. Cook for 8 hours on low. Makes 3 servings.

A few notes: Yes, I realize that the picture looks just like ordinary oatmeal, which is less than appealing, but I promise the cooked apples very much improve it. I'm sure that I could have very easily used dried apples instead of fresh and just added more water, but we have lots of fresh apples here so that's what I used. If you are making for more than 3-4, this recipe can be doubled or tripled. I could have easily doubled it in my small $5 slow-cooker. I really liked the almonds, my daughter didn't. Perhaps next time we will try it without and I can just sprinkle them on afterward.

Friday, September 10, 2010

Food Storage Friday: Breakfast Cookies

Using your food storage at dinner time is great and all, but if you were to be living off your food storage, I certainly hope that you would be eating more than once a day. You need to plan for breakfast and lunch as well. So let's do a few breakfast recipes, shall we?
Today's recipe comes from my very own mom. The smell of these cookies brings back memories. My mom used to make a big batch of these, freeze them and send a few with me on field trips. And they're certainly healthier than many other quick breakfast options. (The original recipe calls for 1 cup of Crisco, and although the characters in The Help raved about it's greatness, I find the stuff revolting. They still taste great with mashed beans and applesauce instead.)

Breakfast Cookies
Food Storage Ingredients
1 cup extra crunchy peanut butter
3/4 cup cooked and mashed white beans
3/4 cup sugar
3/4 cup firmly packed brown sugar
1/2 cup all-purpose flour
1/2 cup wheat flour
1/2 cup oat flour
1 teaspoon baking powder
1 teaspoon baking soda
1 teaspoon cinnamon
1 3/4 cups oats
1 cup raisins
1/3 cup dried grated carrot
3/4 cup dried apple pieces (broken up)
1/4 cup flaked coconut
1 tsp vanilla
1/4 cup apple sauce
(1/4 cup apple juice)
(1/4 cup water)
Fresh ingredients
(grated carrot and apple if you don't have the dried variety)
 2 eggs

1.If using dried carrots and apples put in a bowl with apple juice and water. Heat oven 350 degrees. 2. Mix peanut butter, bean puree, apple sauce, vanilla, and sugars with eggs. 3 Mix powder ingredients and gradually add to wet. 4. Mix in apples, carrots, raisins and coconut. 5. Bake 9-11 minutes or until brown around the edges.
They taste even better than they look.
 A few notes:  When I made this I added an extra 1/4 cup of apple juice to the apples and carrots because I put my raisins in the mix and they were really hard. The original recipe calls for only all-purpose white flour. I used the different kinds of flour to make it healthier, but if you don't want to bother, that's cool. The original also called for fresh carrots and apples. I used dried because I had them and it meant that I didn't have to grate anything and I hate using my grater. For the mashed beans I previously took a can of cooked white beans, rinsed them, mashed them, measured them into 1/4 cup blocks, and froze them in some Tupperware. It made things a lot quicker. I was inspired by this recipe.  I promise that you can't taste the beans. But if you would rather use Crisco instead of mashed beans, go ahead ;).

Tuesday, April 13, 2010

Fat Free Pumpkin Apple Muffins

I've been making these muffins since I was six, although they have evolved quite a bit since then. They started out with a lot more sugar and oil than they have now. And I changed the white flour for oat flour and added some oatmeal and vegetables. They're still easy and satisfying. (And they're a hit with the picky eaters too.) Really, I heart these muffins so much. Trust me they taste better than they look. Plus they're full of Vitamins A and C and fiber.

Pumpkin Apple Oatmeal Muffins

2 1/2 cups oat flour (just throw some oatmeal in your blender)
1 1/4 cup white sugar
1 cup oatmeal
1 tsp baking soda
1 Tablespoon of pumpkin pie spice
2 Tablespoons non-fat powdered milk**
2 eggs lightly beaten
1/4 cup applesauce
1/4 cup orange juice concentrate
2 Tablespoons pureed carrots**
2 cups chopped apples*
1 cup canned pumpkin

Mix dry ingredients together. Preheat oven to 350. In a separate bowl mix wet ingredients. Mix wet and dry together. Spoon batter into muffin tin. (Spray it, grease, use cupcake liners, whichever you prefer.) Bake for 35 minutes. Makes 18 muffins.

** These items are optional. I just throw them in for added nutritional value.

Also of note, if you freeze your leftover canned pumpkin and use it later, you'll have to add more dry ingredients to get the right consistency. I use 6 tablespoons of flour or oatmeal.

*These are best with granny smith apples, but I've tried them with almost every other kind too. I've even used reconstituted dried Tree Top brand apples and I was surprised at how well that worked.

There is also a streusel topping that you can put on them, which I don't usually bother to do. But it is tasty. (You can kiss your fat-free muffins good-bye if you add the streusel topping.)

Streusel Topping

2 Tablespoons flour
1/4 cup white sugar
1/2 teaspoon cinnamon
4 teaspoons butter

Mix first three ingredients. Cut in butter until mixture is crumbly. Sprinkle on muffins before baking.